Escape route or anti-panic area: what changes in a DIALux emergency lighting calculation?
Learn how escape routes and anti-panic areas differ in DIALux emergency lighting, which geometry and luminaires to define, and what a professional report should verify.
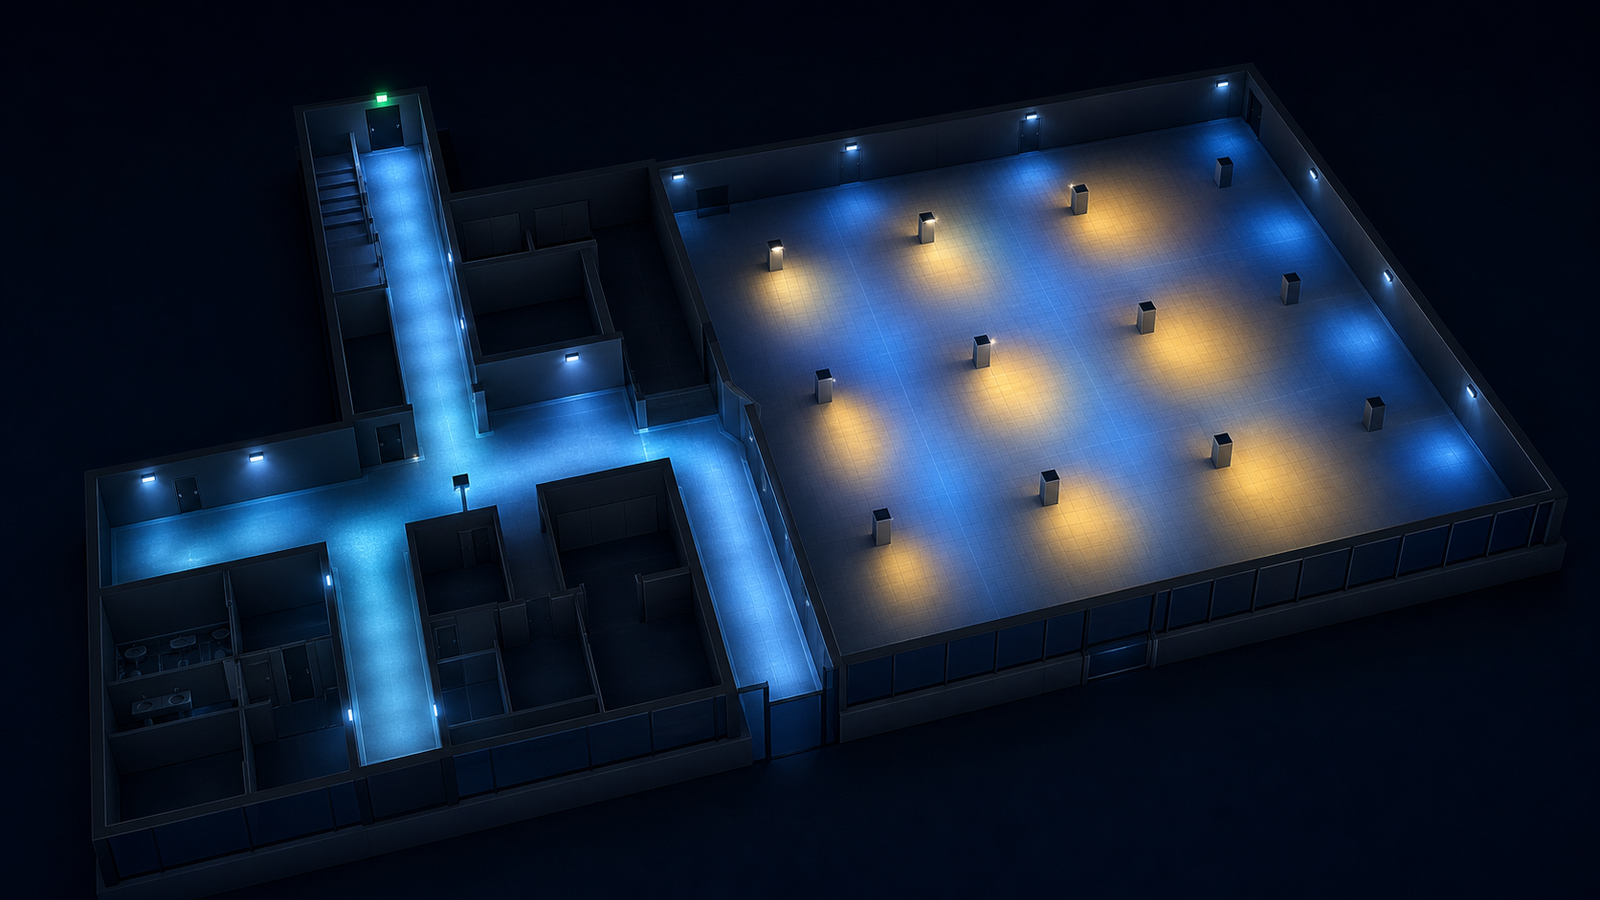
The short answer: one follows movement, the other protects an open area
An escape route is a defined path people are expected to follow toward safety. An anti-panic area is an open zone where emergency illumination supports orientation and reduces confusion before people reach a defined route. In DIALux, they are different emergency-lighting calculation objects and should be modelled from the real evacuation strategy rather than drawn as interchangeable surfaces.
DIALux's official emergency-lighting workflow supports single and intersecting escape routes with assigned widths, plus anti-panic areas with a definable edge zone. The software can calculate and flag results, but the designer must still confirm the applicable standard edition, project criteria and authority or client requirements.
1. Build the emergency geometry from the evacuation plan
Start with a current floor plan and identify exits, doors, stairs, changes of direction, intersections, level changes, large open rooms and any designated refuge or assembly-related spaces. Do not infer the evacuation route only from the normal lighting layout. The emergency calculation should follow the building's approved or proposed life-safety strategy.
Record the relevant dimensions and calculation boundaries. A corridor centreline without the correct route width can test the wrong area, while an anti-panic surface that includes walls, fixed obstructions or an unintended edge zone can distort the assessment. If the evacuation plan is unresolved, label the lighting model as provisional.
2. Use an escape-route object for the defined travel path
DIALux allows an escape route to be drawn in segments, assigned a width and combined automatically when routes intersect. That suits corridors and other identified travel paths where the calculation must follow a continuous route rather than assess the whole room as one open surface.
Review critical locations instead of looking only at a headline result. Changes of direction, route intersections, doors, steps, stairs and transitions between calculation objects may need particular attention under the applicable project rules. The exact required values and placement criteria should come from the current governing standard and project brief, not from a copied template.
3. Use an anti-panic area for the relevant open zone
An anti-panic area is appropriate where occupants may need enough emergency illumination to orient themselves within a larger open space. DIALux can create an area with a defined edge zone, and it also allows manually drawn polygonal areas or multiple areas when a very large room needs a more specific assessment.
Do not classify every room automatically as anti-panic space and do not assume the entire architectural floor plate is the calculation area. Confirm which usable zone is relevant, how obstructions and perimeter exclusions are treated, and whether separate open areas need their own objects. The design decision should be traceable to the evacuation and occupancy context.
4. Define which luminaires operate in the emergency scene
A normal luminaire does not contribute to the emergency result merely because it exists in the model. DIALux lets the designer designate existing fittings for emergency use, select dedicated emergency luminaires, and define whether each fitting operates in the normal scene, the emergency scene or both. Manufacturer-supplied emergency light-emitting data should be used where available.
Verify the emergency luminous flux or emergency lighting factor, operating mode, mounting position, orientation and the exact photometric data. If manufacturer emergency data is unavailable and the settings are configured manually, document that limitation. A KELUAR or exit sign also serves a wayfinding function; it should not be treated as automatic proof that the route or anti-panic illumination is adequate.
Emergency calculation and reporting checklist
Before modelling, collect: (1) the current evacuation and floor plans; (2) the defined escape-route paths and widths; (3) identified anti-panic zones and edge treatment; (4) doors, stairs, intersections and level changes; (5) the applicable standard edition and project criteria; (6) the exact emergency luminaires and photometric data; and (7) emergency output, duration and operating assumptions required by the project.
Before issuing the report, verify that the correct luminaires are active in the emergency scene, inspect every named route and area, review minimum values and uniformity under the applicable criteria, identify weak locations in the CAD view, and align the luminaire schedule with the model. A DIALux calculation can support design evaluation or submission, while acceptance and life-safety approval remain with the relevant client, consultant and authority.
Frequently asked questions
Can one DIALux calculation surface cover both an escape route and an anti-panic area?
They should normally be defined as the appropriate emergency-lighting objects because they represent different geometry and evaluation purposes. Where they meet, review the transition and use the current project and standard requirements.
Can ordinary luminaires be used in a DIALux emergency lighting scene?
Yes, if they are specifically designated and their emergency-lighting properties are verified. Confirm the emergency output, operating mode and photometric data rather than assuming the normal-lighting performance applies.