What should a DIALux car park lighting calculation measure besides average lux?
A practical guide to car park lighting calculations in DIALux: uniformity, dark zones, vertical visibility, ramps, glare, spill light and the inputs a professional report should verify.
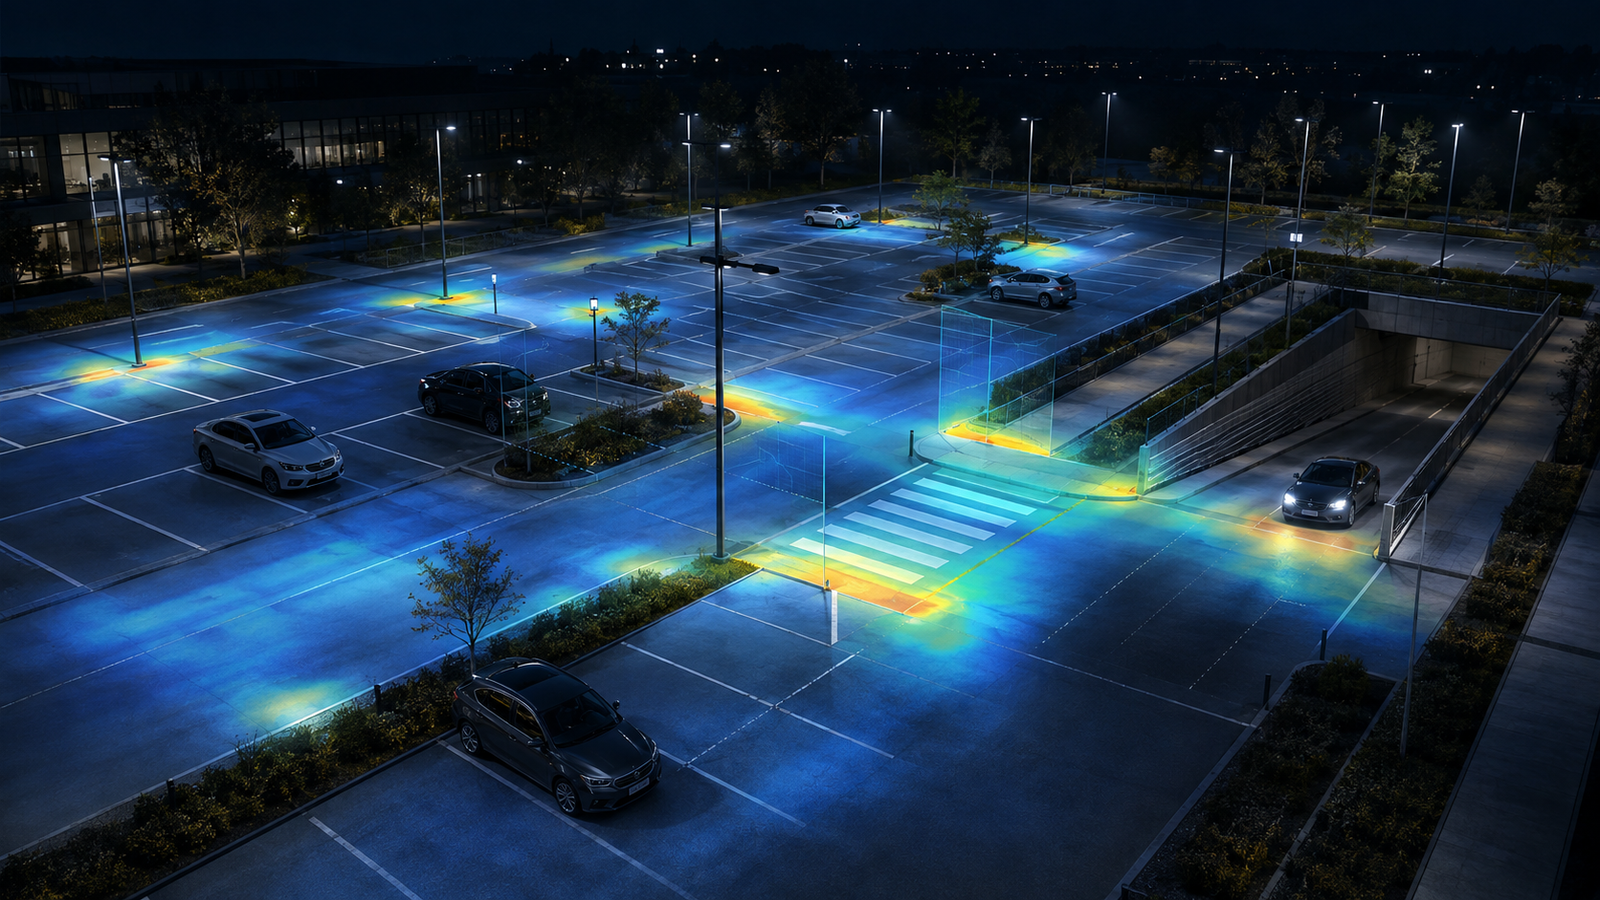
The short answer: average lux can hide the places drivers and pedestrians struggle to see
A useful DIALux car park lighting calculation should test the actual parking and circulation geometry, not only produce one average illuminance value for the whole site. It should also locate minimum values, assess uniformity, inspect pedestrian and vehicle conflict points, consider vertical visibility, and review glare and spill light where they matter.
DIALux supports outdoor calculation areas, calculation points, false-colour views, isolines and glare or obtrusive-light evaluation where the relevant method is configured. The software can calculate the model, but the designer must define the right surfaces, inputs and acceptance criteria for the project.
1. Split the car park into zones that represent how it is used
Parking bays, drive aisles, pedestrian paths, entrances, ramps, payment points, loading interfaces and perimeter areas do not all present the same visual task. A single surface across the entire boundary can blend bright and dark zones into an average that looks acceptable while a critical route remains weak.
Build the model to scale and create named calculation areas for the zones that need separate evaluation. Include kerbs, canopies, columns, walls, landscaping and large permanent obstructions when they affect light distribution or visibility. If parts of the layout are provisional, state that clearly in the report.
2. Read minimum illuminance and uniformity beside the average
Average illuminance describes the overall quantity of light on a calculation area. It does not reveal how low the darkest point falls or how consistently the light is distributed. Review the minimum value and the applicable uniformity metric for every relevant zone, then use false colours, value charts or isolines to locate the reason for a weak result.
Do not improve a headline ratio by drawing the calculation boundary around the problem. Check whether dark areas occur between poles, beside parked vehicles, near the end of a row, below a canopy or at a transition between two luminaire groups. The geometry should remain faithful to the real task area.
3. Add vertical checks where people, vehicles or signs must be recognised
Horizontal illuminance on the ground is not the only visibility question in a car park. At pedestrian crossings, entrances, payment equipment, access-control points and security-sensitive locations, the project may also need vertical or semi-cylindrical evaluation so faces, vehicles, signs or barriers can be seen from relevant directions.
Place calculation surfaces at a justified height and orientation rather than adding a generic vertical plane for appearance. Define what the observer needs to recognise, from where and under which lighting scene. The applicable client brief or standard should determine the required metric and target.
4. Treat ramps, entrances and mixed brightness as transitions
Ramps and covered entrances can create rapid changes between bright and dark conditions. Model their slope, overhead structure and adjacent open area accurately, then inspect the approach and exit rather than judging only the centre of the ramp. A luminaire that produces enough light on one horizontal plane may perform differently on a slope or vertical surface.
If the car park operates with different evening, late-night or emergency scenes, calculate the relevant scenes separately. Dimming can reduce energy use, but the reduced scene still needs to preserve the required visibility and coverage. Document which luminaires and output levels belong to each result.
5. Check glare and light outside the boundary
Poorly aimed or unsuitable luminaires can create direct glare for drivers and pedestrians even when the ground result is high. Review mounting height, position, tilt, optic and viewing direction around approaches, turns and ramps. More lumens are not a substitute for controlled distribution.
Also consider nearby roads, homes, façades and property boundaries. DIALux can evaluate outdoor results and provides dedicated tools for obtrusive-light calculations under supported methods. Whether such an assessment is required depends on the project location, applicable rules and authority or client requirements; do not assume one default limit applies worldwide.
Car park calculation and reporting checklist
Before modelling, collect: (1) a scaled site plan and levels; (2) parking bays, drive aisles, ramps and pedestrian routes; (3) buildings, canopies and major obstructions; (4) pole or mounting positions and heights; (5) exact luminaire photometry; (6) operating and dimming scenes; (7) the applicable project criteria; and (8) sensitive neighbouring locations or glare directions.
Before issuing the report, verify each named calculation surface, average and minimum values, the applicable uniformity result, critical vertical checks, ramp and entrance transitions, glare or spill-light concerns, luminaire aiming, maintenance assumptions and the schedule of fittings used. A DIALux calculation can support design evaluation or submission, while acceptance remains with the relevant client, consultant or authority.
Frequently asked questions
Is average lux enough for a DIALux car park lighting calculation?
No. Review minimum values, the applicable uniformity metric, dark locations, relevant vertical visibility, ramps and entrances, glare, spill light and the assumptions behind each calculation area.
What information is needed before modelling a car park in DIALux?
Provide a scaled plan with levels, parking and circulation zones, pedestrian routes, ramps, structures, mounting positions, exact IES or LDT data, operating scenes and the applicable lighting criteria.